Toyota Ist / Scion xA 2004 – Stereo Removal Step-by-Step | Dashboard Disassembly & Upgrade
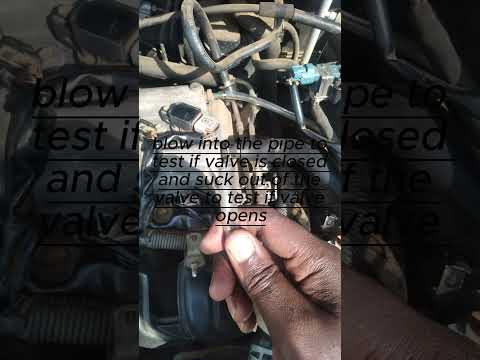
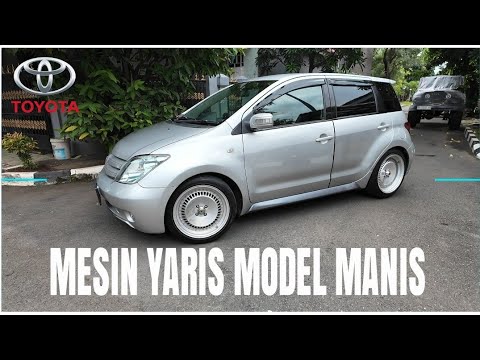
Looking for the WORX WX242 cordless screwdriver I use in my videos? 🔧 Perfect for DIY & automotive work! 🔗 Grab it here: https://s.click.aliexpress.com/e/_c3pM47ix ✅ Step-by-step DIY guide for removing the head unit in a Toyota Ist 2004 (NCP60 / Scion xA) — ideal for stereo replacement, multimedia upgrades, or fixing factory audio issues. This tutorial includes complete dashboard disassembly, revealing hidden screw and clip locations, plus safe wiring disconnection techniques to prevent trim or connector damage. Whether you’re adding Apple CarPlay, Android Auto, upgrading to a double DIN unit, replacing the OEM navigation, or solving a no-sound problem, these pro tips will help you complete the job at home and save on workshop costs. 📌 Applicable for: Toyota Ist / Scion xA (NCP60) 2002, 2003, 2004, 2005, 2006, 2007 💡 Perfect if you're: – Replacing or upgrading your multimedia unit (OEM or aftermarket) – Installing CarPlay / Android Auto or Bluetooth stereo – Troubleshooting no sound, dead screen, or wiring problems – Replacing factory GPS or OEM screen ▶️ Covers: – Dashboard & trim removal techniques – Hidden screw & clip locations revealed – Harness & connector disconnection tips – Safe DIY tool usage: plastic trim tools, Torx/Phillips screwdrivers, panel popper, wiring harness adapter 🔧 DIY car electrician tips – fast, clear, no fluff. 👍 Like the video if it helped you, and subscribe for more real-world automotive fixes. Join the telegram chat Automotive Electrician: t.me/AutomotiveElectrician
Know someone who'd love this clip?
Share it with friends and fellow fans.